Overcoming our "dragons" & becoming one with our true, goddess selves : a book club and support group.

Showing posts with label Joyful Simplicity Activities. Show all posts

Friday, April 26, 2013

Open to Receiving! DIY Patterned Bookshelf

Hi People! I hope you're all having an amazing weekend so far. I wanted to share an experience that made me so happy and grateful a few weeks ago. If you've been reading your Simple Abundance book, you'll know that it talked a lot about receiving all the abundance the universe has to offer you. I love how this journey incorporates not only the spiritual aspects of being, but the temporal as well and how it ties in with the spiritual. Take for instance how Sarah Ban Breathnach writes about how beauty truly comes from within, yet fashion and makeup totally help us to enhance our inner Goddessness. Spiritual, temporal, physical, emotional, even financial...it's all linked! I've been learning that right and left this year. 

Anyway, my experience... April 9th's entry tells us to "declare to the Universe that you are open to receiving all the abundance it's waiting patiently to bestow." I did this out loud at Target after feeling a bit discouraged looking at the beautiful scented candles and persimmon-colored nic nacs that weren't going to work into my budget. I went about my shopping, stopping last in the value section. I saw these beautiful brown paper wrapping paper rolls in the $1 bin and thought, "that would be perfect to cover my new sewing closet shelves in!" I decided to buy $10 worth. Well I was super happy when I did a double take at my checkout total and realized that I got 10 rolls of paper for just $3! I felt so grateful all day and still do every time I look at my revamped shelves. It's a symbol to me that God wants to bless us with things that will add to our joy. I also realized that a lot of times joy and abundance is right there in front of us, we just have to use a bit of creativity to make it work for us. Just like God created the universe from unorganized matter, we can create beauty and positive energy out of the abundant materials we're given every day. 

Here are some pics. Sorry for the not-so-crisp-and-bright-fancy-photos. I declare myself open to receiving all the abundance the Universe has to offer me in the form of a nice camera! :D 


I found covering this bookshelf was cheaper, less messy, and quicker than painting it. All I did was carefully measure out the wrapping paper to fit on every piece of the bookshelf. Then, I took some homemade "Mod Podge" that I made out of white craft glue and water and painted the bookshelf with it, spreading the paper pieces on as I went. I touched up a few bare specks here and there with some paint that matched my paper at the end. I love how it turned out! 

Monday, April 8, 2013

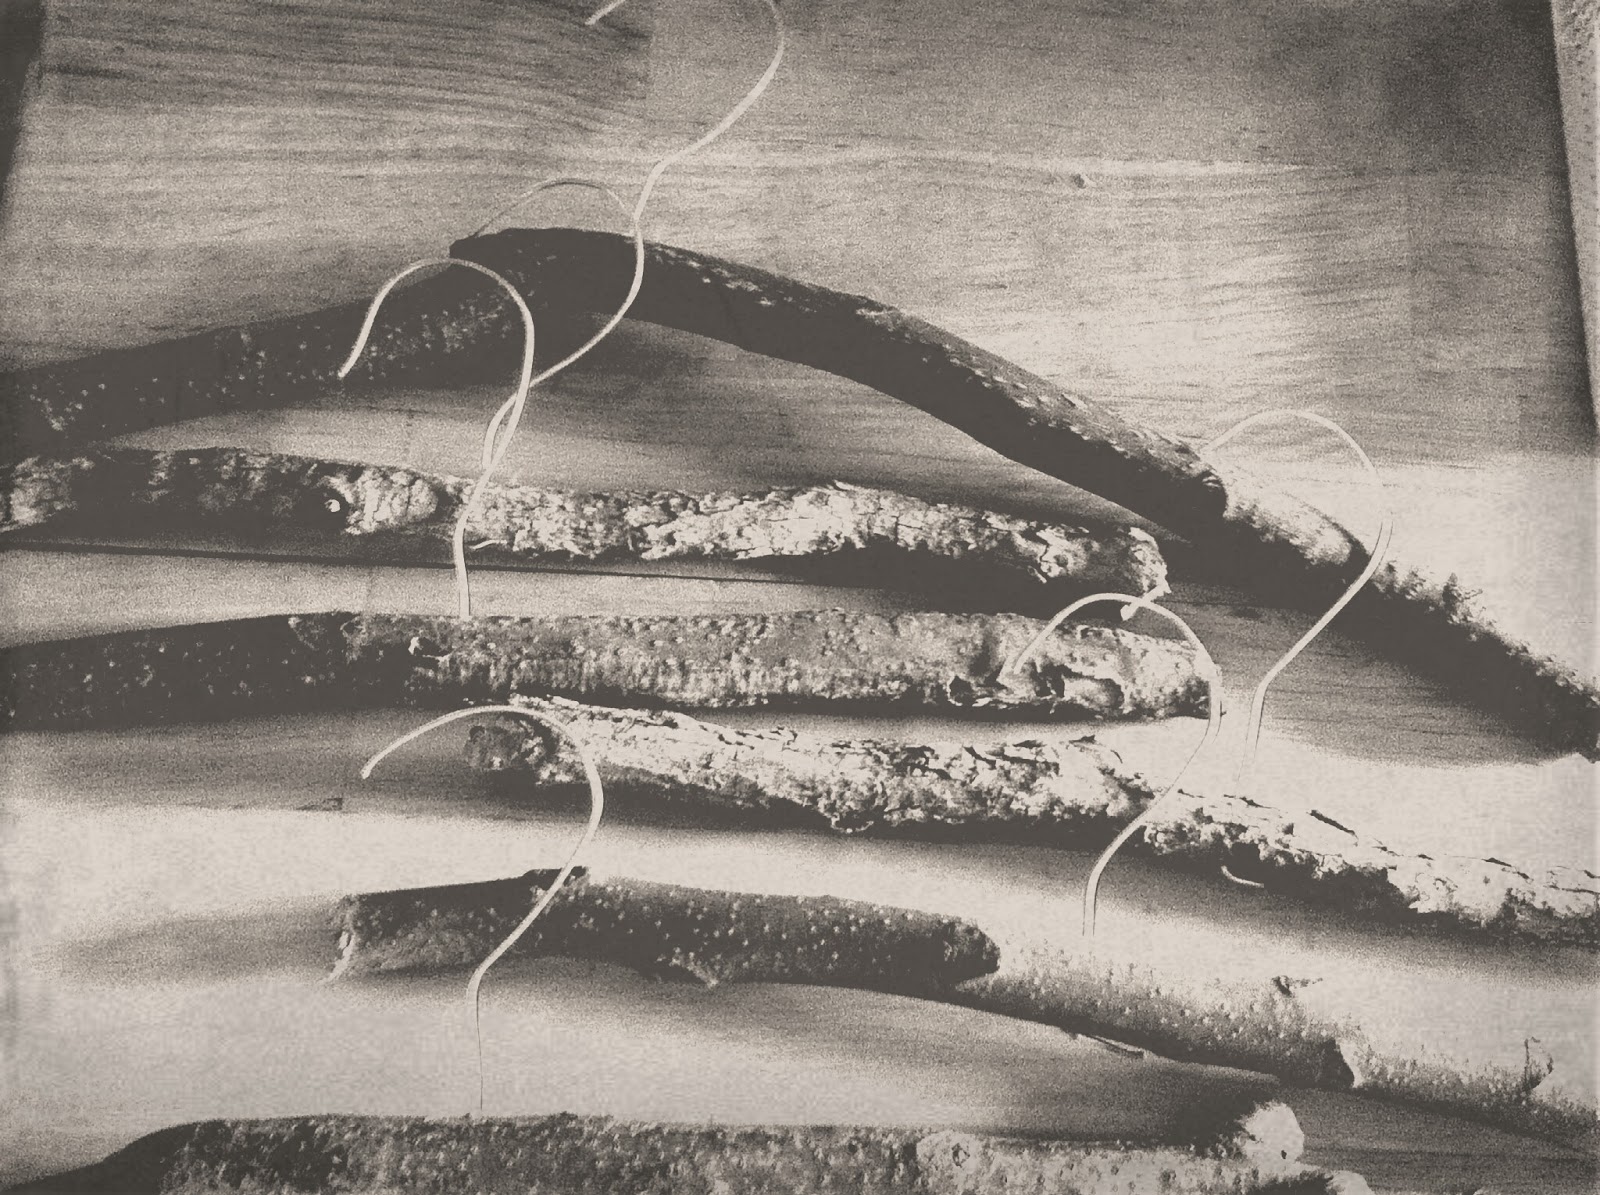
DIY Nature Clothing Hangers

Our Simple Abundance book has been talking a lot about our wardrobes for the past month. It's had us making sure to only surround ourselves with things we absolutely and authentically love, eventually getting us to clean out and simplify our closets. Well, I did...tried...and still wasn't getting a good vibe from my wardrobe. I had only my favorite, can't-live-without items hanging up, but something just wasn't working. I finally realized that it was the mismatching plastic hangers throwing me off! I'm not a fan of plastic anywhere else in my decorating, so why should my closet be any different?

I got to work fixing the problem the way I fix every aesthetic dilemma I face--by adding a touch of nature! I remembered a post I saw years ago on Free People's blog on painting sticks and turning them into clothing hangers.


So, I collected some hanger-sized sticks and got to work. I still have my Christmas tree, void of needles, since I just knew I would end up needing branches at some point (am I weird?). I sawed off some of that and found the rest in the park. 

After sawing the sticks to the size I wanted, I baked them in a 250 degree oven for 30 minutes or so just in case they had any mites or other unwanted nasties (not sure if this temperature and cook time was right, so you might want to research it). Then, I painted them any old way I pleased.


I could have kept painting and painting since I love color so much, but I leaned on the simpler side and forced myself to leave them be. I drilled a hole all the way through the center of each stick with a drill bit smaller than the size of the wire I was using for the hooks. I shaped each hook out of 16 gauge wire. I think, going back, I would use a little bit thicker wire or even some premade hooks from the hardware store just to make them a bit more sturdy. 

Lastly, I inserted each hook all the way through the drilled holes and bent the end of the wire so it wouldn't come out. 


Icky-vibe-from-wardrobe-problem solved! 


Has anyone else had experiences with freshening up their wardrobes? Please share...

Friday, March 8, 2013

DIY "Chalkboard" Pots

For this week's Joyful Simplicity activity, we planted cactus seeds in "chalkboard" decorated pots.


Supplies
  • Packet of cactus seeds (or any plant seeds of your choice, just make sure to do some research so you know how to take care of it)
  • Small terracotta pots
  • Pebbles
  • Potting soil
  • Black and white acrylic paint
  • Fine-tipped paintbrush or white paint pen 
  • Foam paintbrush
So I put "chalkboard" in quotes, because I painted these pots with black chalkboard paint that I made myself and originally drew on them with chalk. This morning, however, I saw that the chalk had faded because the clay pots had absorbed the water in the soil. So...I decided to do designs in white paint so it would have the effect of a chalkboard without the fading. 

Ok, so to get the look that I got on my pots, first paint your pots black with a foam brush. I watered my paint down a bit for easy spreading then painted several coats. The one on the left in the picture above has that chalky look because it's painted with chalkboard paint (I just used black paint mixed with some corstarch) and hadn't gotten wet yet. Not sure if it will still look like that when it absorbs the water, but it's up to you whether you want to use plain black paint or chalkboard paint. 

Decide what design you would like in white. I thought I would do lyrics to one of my favorite songs on one of my pots and paint, "Grow" on the other. It might be cute to paint the name of the plant you're planting and some care instructions! It would be easiest, I imagine, to paint your designs with a white paint-pen, but a fine-tipped brush works too with some extra care. 

After you're pot's finished drying, fill it with and inch or so of pebbles. This will provide for good drainage. Then, go mix your potting soil with some water in a container. This will make sure the soil is all nice and damp for the new baby seeds. 

Fill your pots almost to the top with soil. Now for the planting: all you need to do with the cactus seeds is sprinkle a pinch on the top of the soil and press them in just a little.  


Place your pots on a sunny windowsill. Cover them with plastic wrap or a plastic bag to keep in the moisture until your seeds have germinated. At that point, you're on your own! Hahaha. I imagine you would see which of the new plants look the strongest and pinch out the rest, but you should do some research on the internet to find out for sure. I'm no experienced gardener as much as I am fascinated with it! 


\
Enjoy!
Lacey

Saturday, March 2, 2013

DIY Teacup Candles

For our Joyful Simplicities Activity this week, we continued with our candle theme by making teacup candles. I had never made candles before, but it proved to be real easy!


Supplies
  • Candle making kit (we used a soy wax kit that came with dye, scents, and wicks)
  • A "Presto Kitchen Kettle" from Walmart or wherever (or you can research how to use the "double boiler" method) 
  • A flat bottomed wisk or something similar to stir with
  • A thermometer 
  • Super glue 
  • Teacups or small glass or ceramic containers (I got ours from the thrift store for cheap cheap cheap)

We first measured out our soy wax according to the directions on the kit (Well, sort of. We mostly guessed.)  We turned the temperature on our little Kitchen Kettle to "warm" and poured the wax in. Stick the thermometer in since keeping track of the temperature of the wax is important (do not let your wax get to hot or it might burst into flames). 


In the meantime, we place our wicks in the candles using tape and popsicle sticks to hold them into place. I recommend you use a dab of super glue instead. Just put a drop on the bottom of the wick then press it against the bottom of your teacup. After you've place the wicks in, go put your teacups in the oven on warm. You want to avoid pouring hot wax into cold cups.


When the temperature of our melted wax got to 170, we stirred in some dye. We chose yellow first since it seemed to work well with the "Hawaiian Dream" scent we were going to use. Soon after we added a little bit of our scent (the instructions in your kit should tell you just how much. We, again, guessed). Stir in the scent for a couple of minutes. 


Get your teacups out of the oven and get ready to do the final step...
We let the wax cool down to 150 then poured from the kettle into a pouring cup. From there, we carefully filled our teacups with wax making sure not to knock over the wick.

Let those puppies harden for a couple hours and don't light them for a day or so. Hope this DIY gives you the joy that comes from making something beautiful with your own two hands!


Lacey

Friday, February 22, 2013

DIY Doily Candle Holders

For our first Joyful Simplicities activity, we made candle holders in connection with Candlemas Day. Have a jar somewhere in your kitchen? Clean it out (please refrain from eating an entire jar of chocolate sauce or the likes), and get going with this super cheap, super easy DIY...

Supplies
Glass jar
Paper Doilies (I got a big pack of them for $1 at my local dollar store)
Mod Podge
Paintbrush
Ribbon (optional)
                                      

1. Paint some Mod Podge on the jar where you want your doily. Stick the doily to it.

2. Paint a coat of Mod Podge over the doily (don't worry, it will dry clear.) Continue steps 1 and 2 for as many doily pieces as you want to put on.

 3. That's it! You're done! Tie a ribbon around the rim if you'd like. 


 By the way, these darling jars have more uses than candle holding...
  

Lacey